
Blog
Wedding Flowers – Creating Your Own
It’s Fun! It’s Less Expensive! It’s Just What You Ordered! It’s the Perfect Colour!
That said; it is a little more work . . .
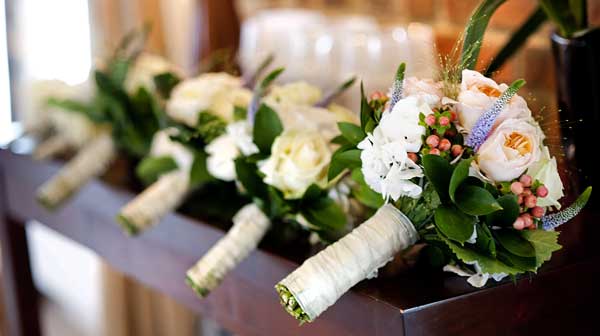
Your Wedding Flowers
Making your own wedding centerpieces, can be done with a quick visit to the Dollar Store (at least that’s a great starting place, as you know the price already). A clear glass globe or cube is a lovely choice that isn’t too difficult to assemble yourself. Fresh, flowers with a ‘full look’ such as roses work best for this project. Plan on a few hours and the requirement of a few friends the day before the wedding, but before you begin, have your containers ready and filled with clean (and if you’d like, coloured) water.
Items you’ll need:
- 50 to 75 stems of a hardy flower like the rose. (depending on how many tables you’re using)
- Container (Glass Globe or Cube work well
- Green adhesive floral tape (1/4″)
- Stem cutter, scissors or very sharp knife
- Stem stripper
- Wedding Flowers
Step 1: Preparation of the Flowers
 Using a stem stripper (or gloves) remove excess foliage and thorns, and pull off damaged or unattractive outer petals.
In a sink or bucket filled with water, hold the stems underwater and trim the stems at an angle about 2” from the bottom.
Allow the flowers to drink for a few seconds with the stem ends underwater, then place in a bucket filled halfway with cool water until you are ready to use.
(Note: If you’re working with roses and the heads aren’t open yet, force the blooms open by placing the stems in a bucket of hot water. But do this only for a couple of minutes just before you are going to use the roses, or you might kill them otherwise. This works for DIY wedding bouquets too.)
Keep the stems long while working with them and trim to the desired length when you’ve finished with your arrangement.
Step 2: Assembling the Flowers
Take one stem at a time with one hand, and use your other hand to hold the flowers in place.
Assemble four flowers at an even height in a square shape – these will be at the center of the arrangement.
Add the other flowers one by one around the center flowers to create a dome shape.
(Note: As you’re creating the dome, occasionally hold it up to your vase to gauge the width of the arrangement and adjust to create a pleasing overhang of flowers over the edges.)
Step 3: Securing the Centerpiece
Using adhesive floral tape, bind the stems at the natural spot where they join (about 3 to 4 inches below the flower heads).
If desired, repeat the binding toward the end of the stems, leaving about 2 inches excess beneath the bind to trim later.
Step 4: Measuring the Centerpiece
Hold the arrangement alongside your container to gauge how much stem you’ll need to trim from the ends.
Trim the stems to the necessary length, cutting across on an angle to allow for better water absorption.
Step 5: Finishing the Centerpiece
Gently place the arrangement into a container.
Once the centerpieces are completed, keep them misted and refrigerated or in a cool or air-conditioned room away from heat and light until you are ready to use them.
If you’re using clear vases, you can allow the stem ends to fan in the water for a modern look, or bind them for a finished, clean appearance. To help prolong the life of the flowers, add a drop of bleach or lemon-lime soda to the water.
- Home
- Celebrating Your Reception
- Creating Your Perfect Wedding Ceremony
- Destination Weddings & Honeymoons
- Giving Back
- Happy & Healthy Marriages
- Misc Stuff & Fun for the Big Day
- Planning Ahead
- The Legal Stuff
- Themed Weddings
- Wedding Etiquette
- Wedding Shows
- Wedding Trends
- Wedding Vendors That Serve You
- Wedding Venues